Although, Disk Management is integrated in Settings app of Windows 10, but still its hidden and interested users have to enable it manually using Vive Tool, the tool works just like Mach2. You might be interested in reading – How to Install Windows 10 on Raspberry Pi 4 (Tutorial)
Enable Disk Management Tool in Windows 10 Settings and Use it
Before activating the Disk Management tool using the steps discussed below keep in mind that the feature is under development so don’t expect anything good from it. Its just for early tester.
In case, you’re using Windows 10 v 20175 in Dev Channel and would like to enable the feature, then here’s how you can do it:
Download Vive Tool for Windows 10 using this link, extract the files and then Open the Vive Tool folder.
Next, you need to click on the File > Open Windows PowerShell > Open Windows PowerShell as administrator
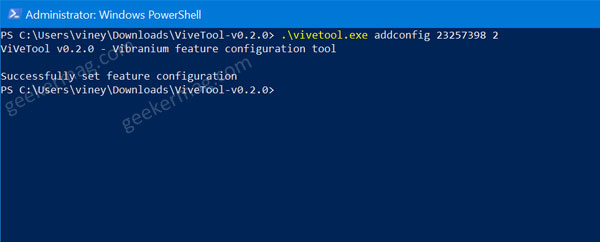
Here, you need to execute this command: vivetool.exe addconfig 23257398 2
In case, you get error that vivetool not recognized then execute this command: .\vivetool.exe addconfig 23257398 2
Once done you will get a message which reads “Successfully set feature configuration“. At this point, you have successfully enable the Disk Management in Settings app.
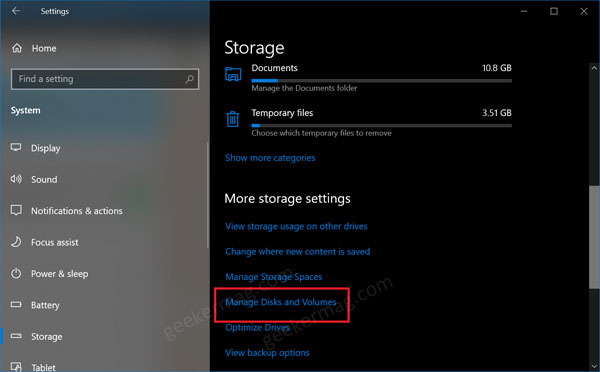
To check the new setting, you need to launch Settings app > System > Storage.
On the right side, scroll down to bottom and you will find a link which reads “Manage Disks and Volumes“, click on it.
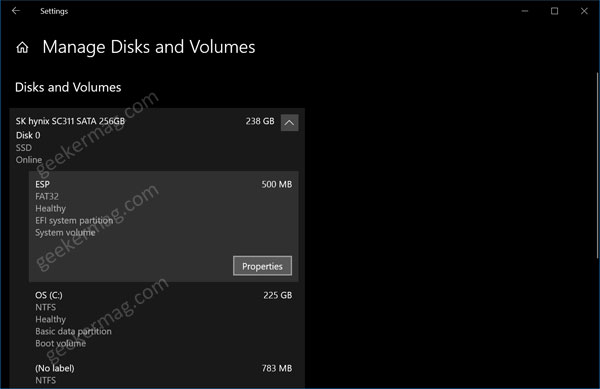
On the next page, you will get list of disks and partitions on your computer.
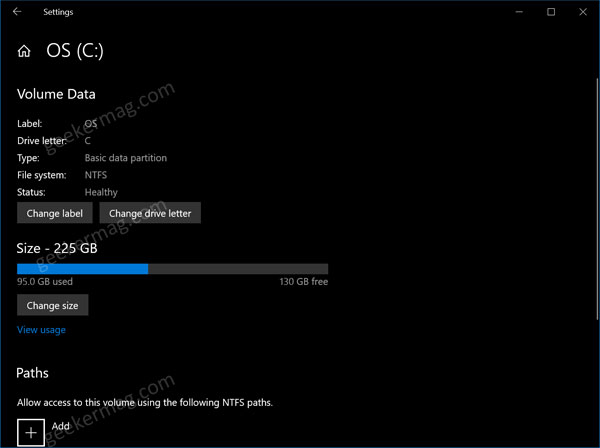
If you click on the particular partition Properties button will appear, click on it will gives you more options to manage the partition or drive.
Here, you you can change the name of the partition, the drive letter, or the size of the partition. You can also add path to access the particular volume using the same NTFS path You can also access Bitlocker protection for Volumes and drives too.
What are your thoughts about Microsoft integration of Disk Management tool in Settings app of Windows 10? Let us know your thoughts in the comments.


