Whenever you search anything using taskbar search, it saves all the recent searches locally with default settings. You can find it in recent searches listed under the ‘Recent’ section shown in the following screenshot:
For example, it could be a particular setting, an app that you’ve opened recently, or a query powered by bing.
If you don’t want Taskbar or Windows search to show your recent search queries or want to completely remove the ‘Recent’ section, then the good thing is there’s a setting available using which you can turn it off in Windows 11. Let’s learn how to do that.
Enable or Disable Recent Search History in Windows 11
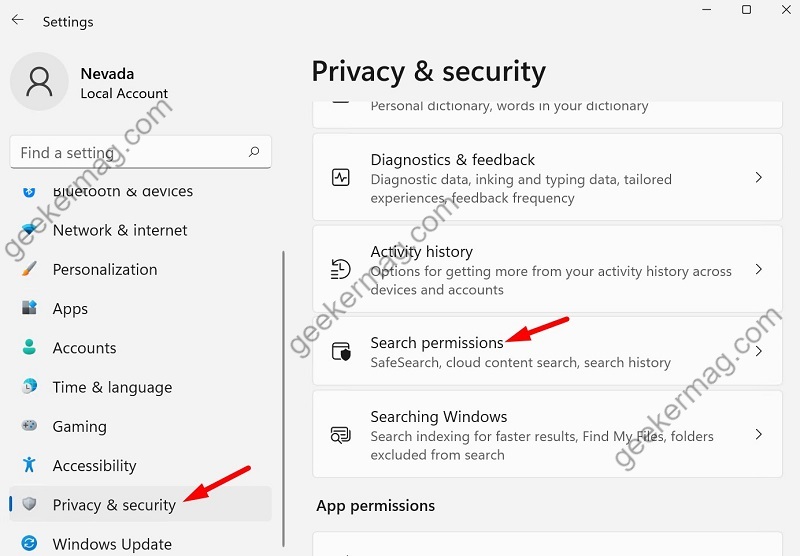
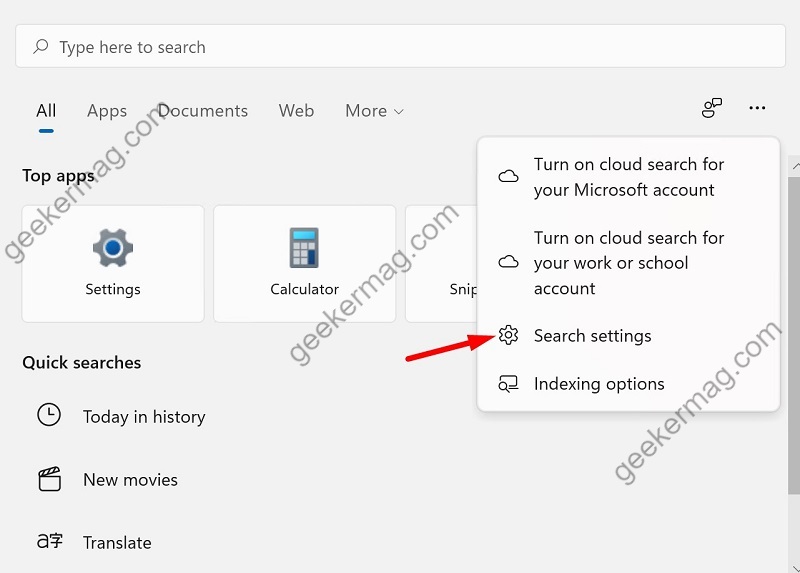
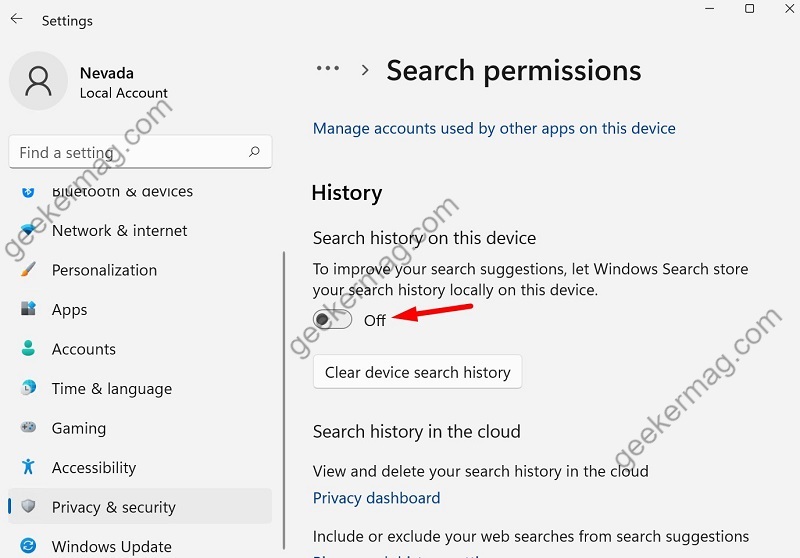
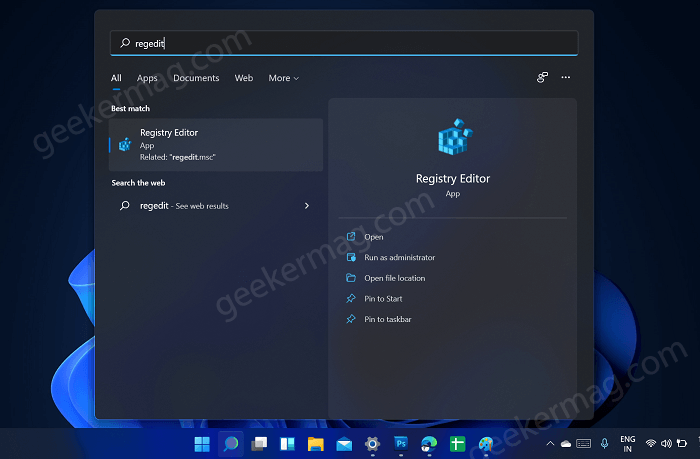
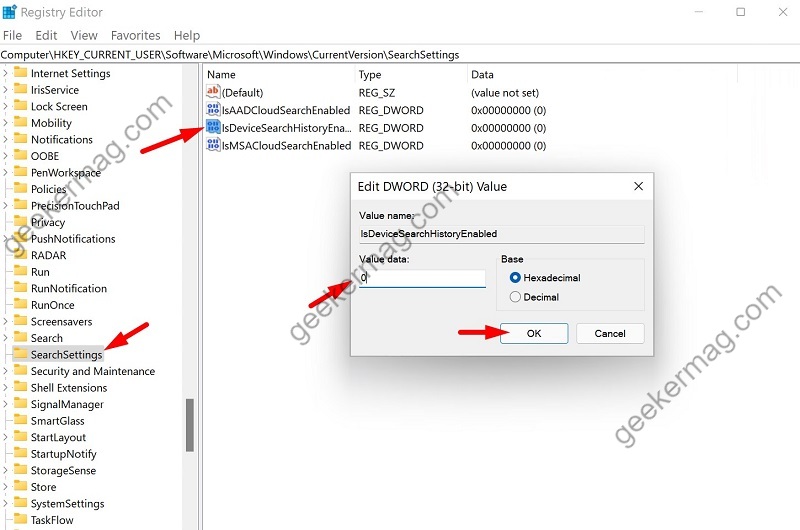
Below in this blog post, we will share step-by-step instructions on how to turn ON or OFF Recent Search History in Windows 11 Search Window. Open Settings in Windows 11 by pressing WIN + I button on the keyboard. In the Settings app, switch to Privacy & security tab. On the right side, locate the ‘Windows permissions‘ section and scroll down and click on Search permissions. Alternatively, you can search settings in Windows 11 directly. For that, click the Ellipse icon available on the Windows Search and select Search settings from the menu. On this page, scroll down to the History section. Here, turn off the option that reads “Search history on this device“. This will disable taskbar search history in Windows 11. After that, click on the “Clear device search history” button and this will delete the search history stored locally on the device. At any point, if you want to enable Recent search history in Windows 11, then you need to turn ON the same option again. Alternatively, you can turn ON or OFF Recently search history in Windows 11 using the Registry editor. Here’s how you can do that: Launch the Start menu in Windows 11 by pressing the Windows button and then type Regedit when it appears in search results, click to open it. In Registry Editor, head over to the following key: HKEY_CURRENT_USER\Software\Microsoft\Windows\CurrentVersion\SearchSettings (You can paste this path into the navigation bar and hit enter to reach directly) In the SearchSettings key and then on the right side, find the “IsDeviceSearchHistoryEnabled” DWORD value. Double-click on the same value and set its Value data to 0 to disable recent search history in Windows 11. Click OK to apply the changes and then reboot your computer. At any point, if you want to Enable Recent search history in Windows 11, you need to set Value data to 1.